Editing with Curves also allows control over where certain effects take place. Increasing contrast in one area of an image often requires lowering it in another. This decreased contrast can be limited to a range where it has limited impact when using Curves.
In GIMP, the Curves tool can be accessed under Tools-Color Tools-Curves or Colors-Curves. The method will differ if using a different editing program.
Sample Curve with Corresponding image :
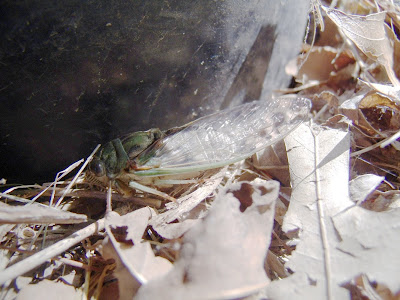
I used this image in my post on reading a histogram. I decided to reuse it here because this image is one where editing using the Curves tool will probably yield better results.
The gradient bar at the bottom of the histogram represents the pixels' current value, referred to as the input value. The bar on the left side represents the output value, or the value the pixel will be set to once the changes are finalized.
(After clicking on a dark area behind the cicada.)
Editing
The line running from the lower left to the upper right represents the changes made to the image (this line is referred to as the curve from here on). A straight line from corner to corner means that the input levels are the same as the output levels, meaning no changes have been made.
Altering the image is performed by creating and moving anchor points. The curve starts with two points; one at 0,0 and the second at 255, 255. New anchor point are created by clicking on the graph. Clicking on the curve creates an anchor point at that point on the curve. Clicking outside the curve creates an anchor point there and moves the curve to that point.
Anchor points are moved by clicking on the anchor with the left mouse button and dragging the point while holding the mouse button down. The display provides a light gray line mirroring the original line as a reference point.
Areas of the curve above the reference line represent pixels that have a lighter value than they had originally. Areas below correspond to pixels that have been darkened. The distance from the line represents the amount of change. (This is in value mode, the curve in channel mode indicates change in color or transparency.)
Edited image
The above image after editing curves,
(GIMP doesn't offer gamma correction as a stand-alone option. It uses the middle slider on the Levels tool for gamma correction.)
 |
| Final Result |
Definitely better than the starting image. Not perfect, but better. "Perfect" probably requires different lighting conditions when taking the photo in the first place.
Try the online GIMP manual for more information on using curves to edit an image. While the information is specifically meant when using GIMP, it is useful when using other image editing software.
Care needs to be used when editing an image with Curves. Large changes can result in the image looking posterized, with bands of colors instead of gradations. Large changes can lead to some interesting effects, so the tool is definitely worth experimenting with.


No comments:
Post a Comment